
 To begin making the ports I started with creating a stencil out of styrofoam. I used two one quart cans side by side to get the rounded edges and then just drew lines between them to get the shape. Then cut out enough for all the ports.

 Then I drew an outline of were I wanted the ports to line up prior to cutting into the cabin walls.

 Then all the portholes were cut.

 Notice I added two extra portholes in the front for better visibility from inside.
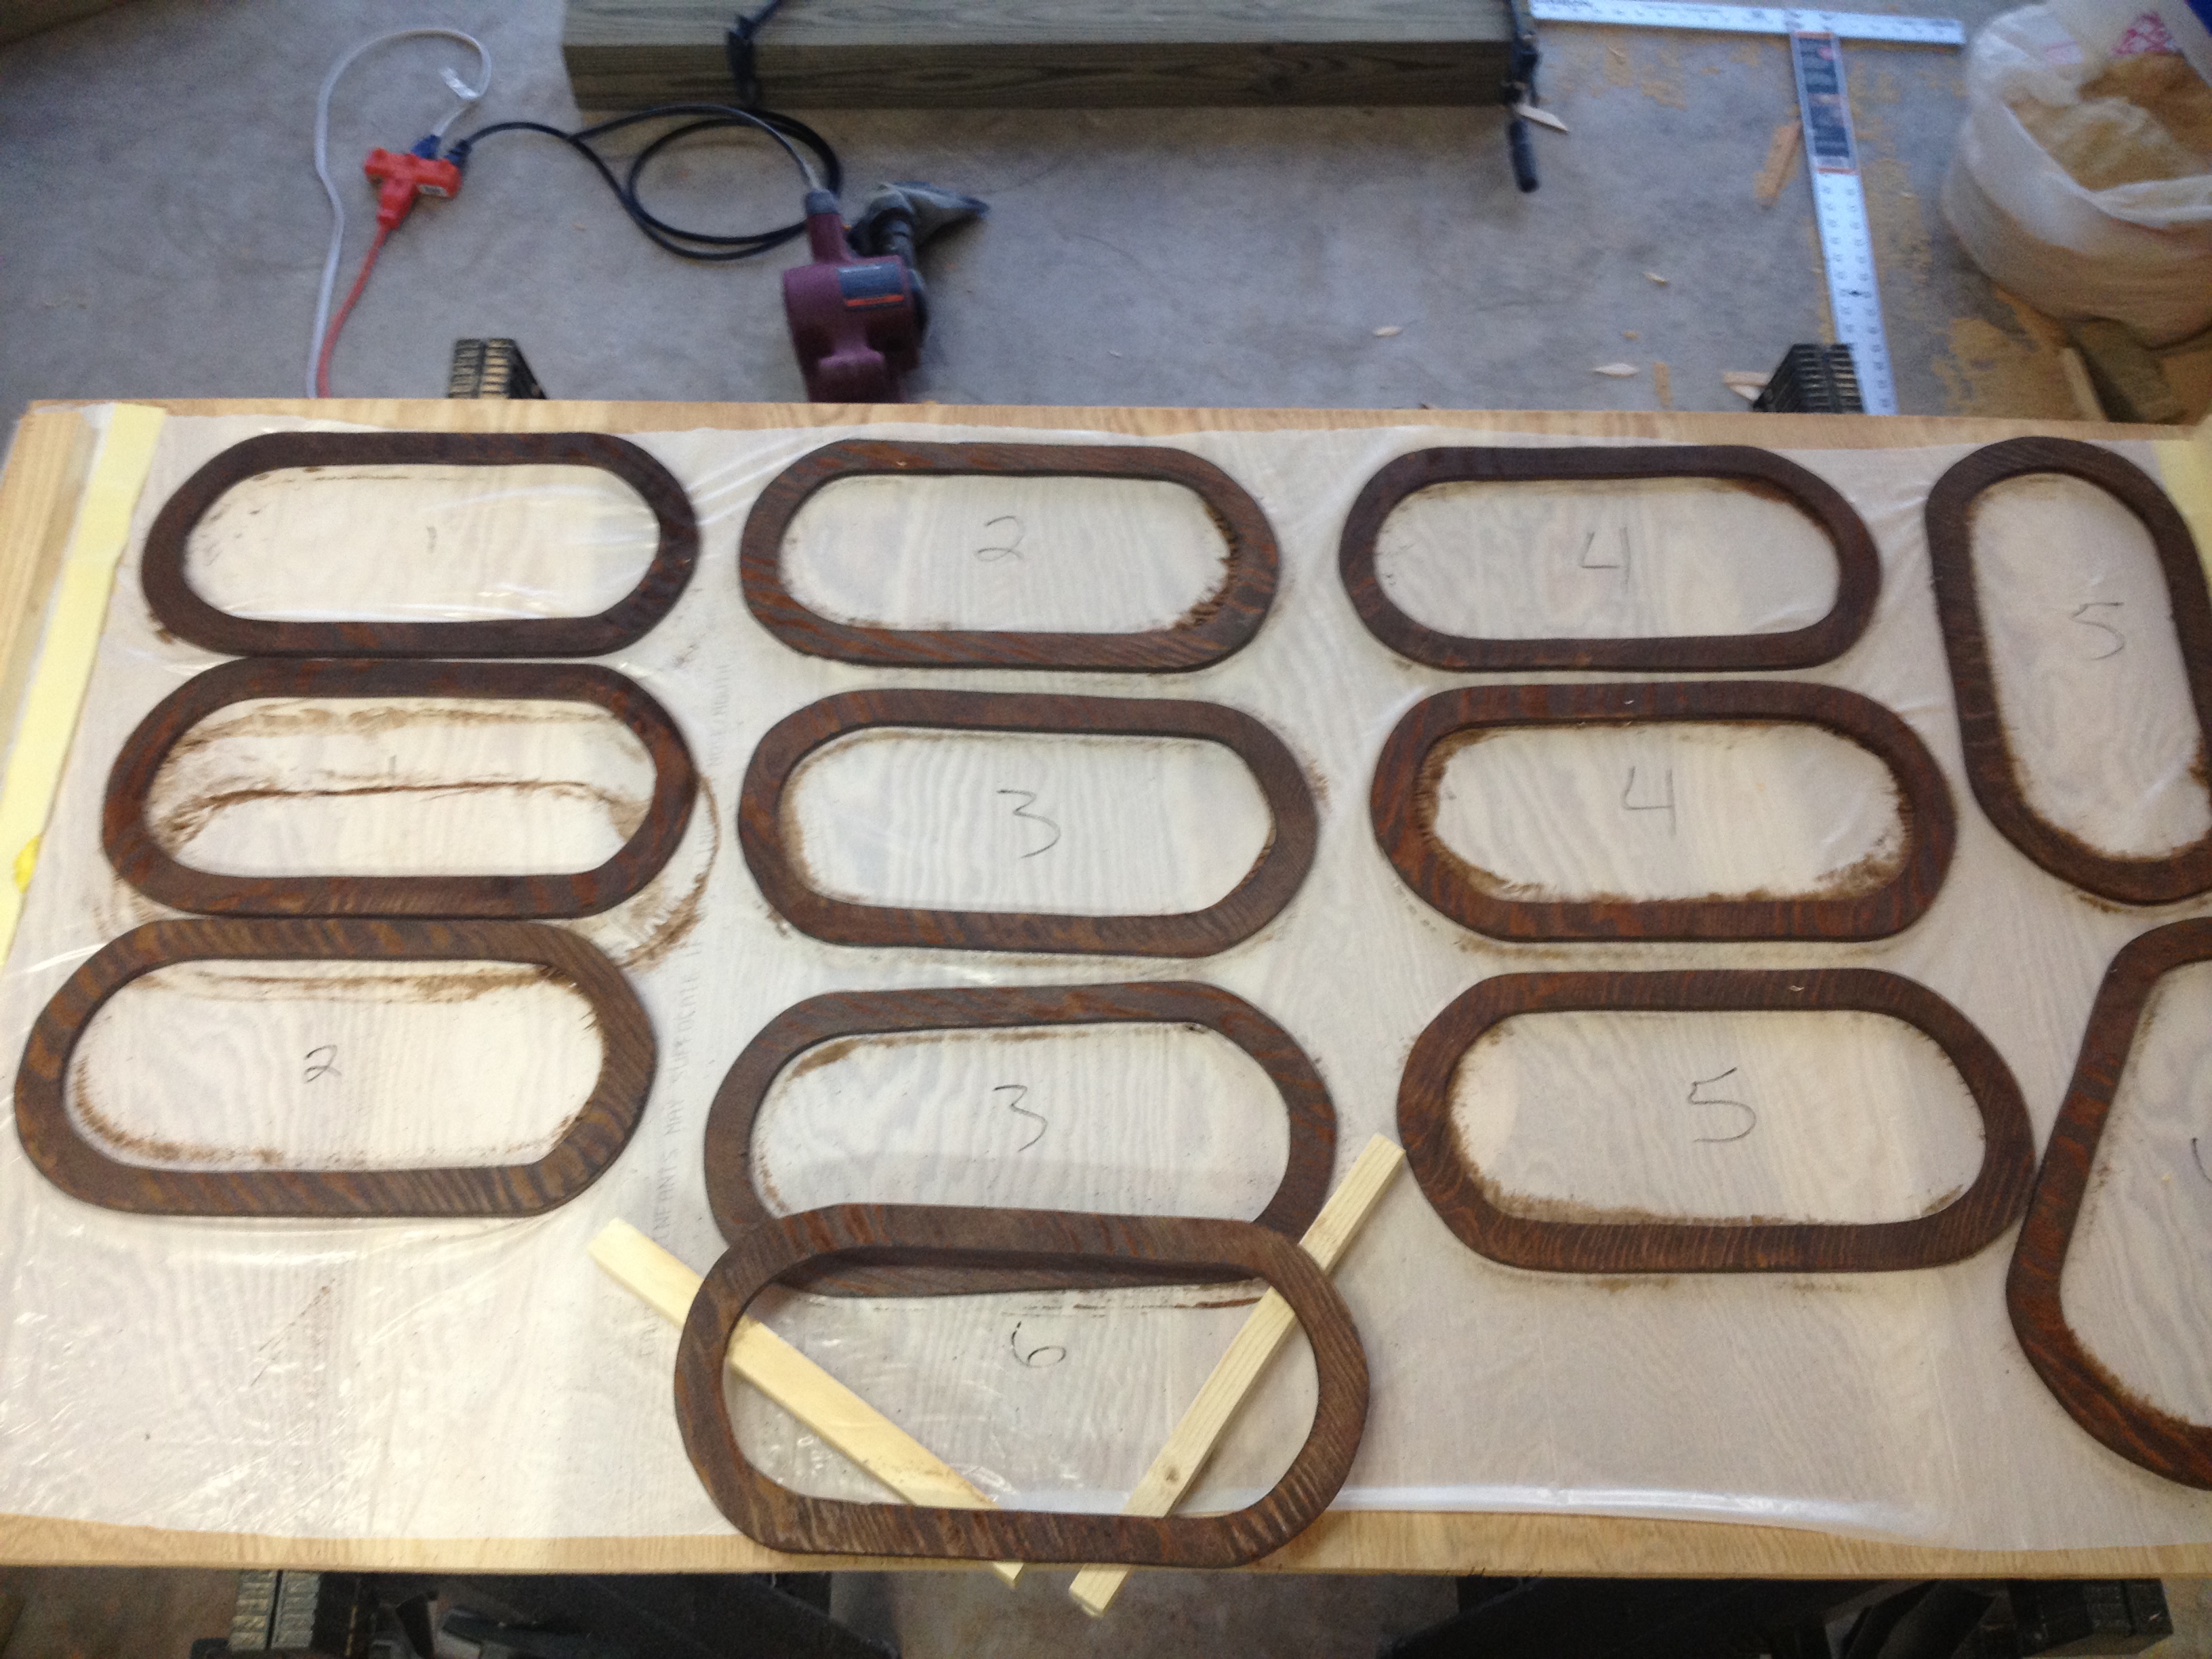
 All the porthole rings cut and stained and all the plexiglass marked for cutting.
*Note* Plexiglass was too brittle and cracked easy, so I changed it out for Lexan. Cost a little more but was easier to cut and much stronger.
 You may have noticed in the above picture that there are more porthole rings than portholes. This is because I am making opening windows with an outside screen.

 The porthole windows installed with nice brass locking fixtures.
Unfortunately the two forward portholes are too curved to make functional opening windows, so they will remain fixed ports.